
Today we are going to circle back to a topic that we covered in 2021. Last time we looked at PhoenixNAP’s Phoenix data center (they are now building a much larger facility next door.) Something we saw on our tour was the company’s cloud and bare metal cloud offerings in various racks. This time, we are taking a look at what infrastructure those racks are providing and what you can do with it. Specifically, we are going to look at the company’s Bare Metal Cloud offering. We have a lot of feedback that folks want to see more about using the technology we cover, and so this is an opportunity to do so.
Quick disclosure: PhoenixNAP is sponsoring these instances for us to use. We followed a normal customer sign-up procedure to ensure we are showing the same experience our users will have.
What is the Bare Metal Cloud
First off, when PhoenixNAP says that it has a “bare metal cloud” it is not kidding. Just to give you a sense of what they mean, when you reboot a system, you can see the Supermicro logo splash screen via the HTML5 iKVM (all of the systems we have tried thus far are Supermicro-based.)

While many are familiar with the idea of renting dedicated servers, the PhoenixNAP BMC service can be billed hourly and has some tie-ins to its other cloud services like its block storage offering. After using the PhoenixNAP BMC offering, it is somewhere between a large public cloud provider’s experience and a dedicated server experience. One still gets the flexibility of a cloud model with cost structures that are more like a dedicated server hosting provider.
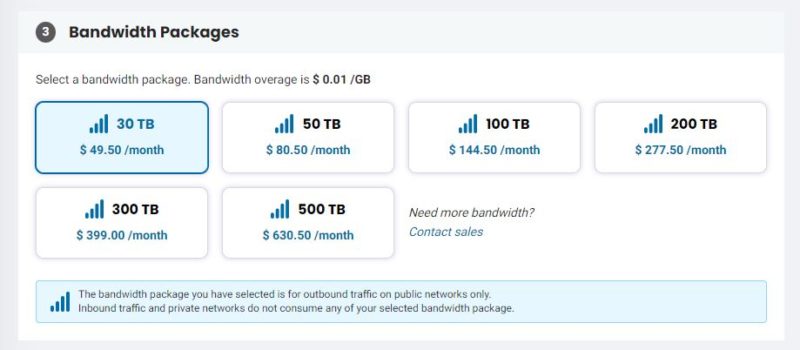
A good example of this is bandwidth. When we do our “Falling from the Cloud” series, a lot of the savings STH generates over hosting on AWS or another public cloud provider comes down to bandwidth costs. We even host our video on YouTube, but millions of page views with many images mean that generates a bandwidth need of thousands of dollars per month on the public cloud. PhoenixNAP has more free tier bandwidth 15TB. That costs roughly $1357 on AWS.

Even if you go over that free allotment, which is not necessarily hard to do across multiple servers, chargeable bandwidth is much lower than cloud providers. AWS US East Ohio is $0.05 – 0.09 per GB out to the Internet. PhoenixNAP’s Phoenix overage is $0.01 / GB and that is much higher than the monthly bandwidth packages.
The public clouds have absolutely awesome services. There are well-known areas with enormous markups like data transfer charges that traditional VPS, dedicated hosting, colocation, and smaller cloud providers can make their offerings look great on. That drives how STH is hosted as an example.
Another cool feature is that sometimes we can get systems that have unique features. Specifically, we are going to look at Intel SGX as a secure enclave feature and how that is enabled.
Getting Started with the PhoenixNAP Bare Metal Cloud
The first step is having a PhoenixNAP account. As a quick note, PhonenixNAP is sponsoring the instances, but I went through the setup process myself. Once you have an account, you can log into the BMC portal. As a quick note, this article was done over several weeks, but I wanted to try something before it went live so we are going to get to what these five machines are doing shortly.
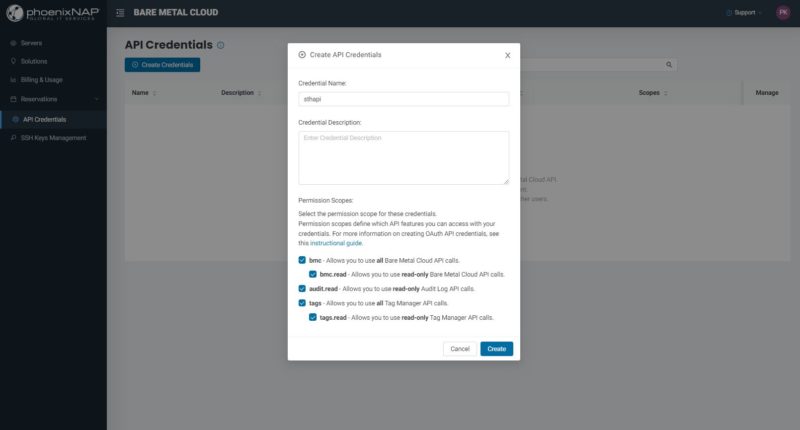
First, we are just going to mention that we are using the web version since it looks better for screenshots. There is also an API verison available and you can create credentials here:
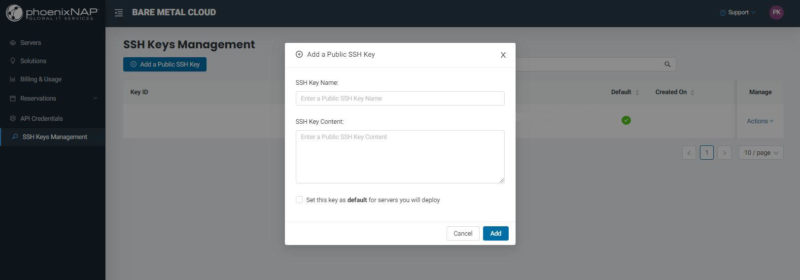
Perhaps the first task is actually to setup your SSH key(s). One can either do that on the key management page, or do it during the setup of the bare metal cloud servers.
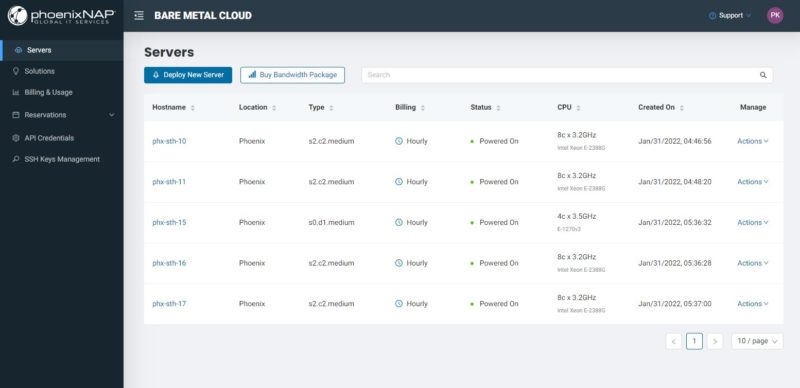
Clicking on “Deploy New Server” from the Servers tab, gives you a number of options. First you select the location, then the billing. Here you can choose either hourly (think of this as on demand) or get further discounts by reserving for 1-3 years.
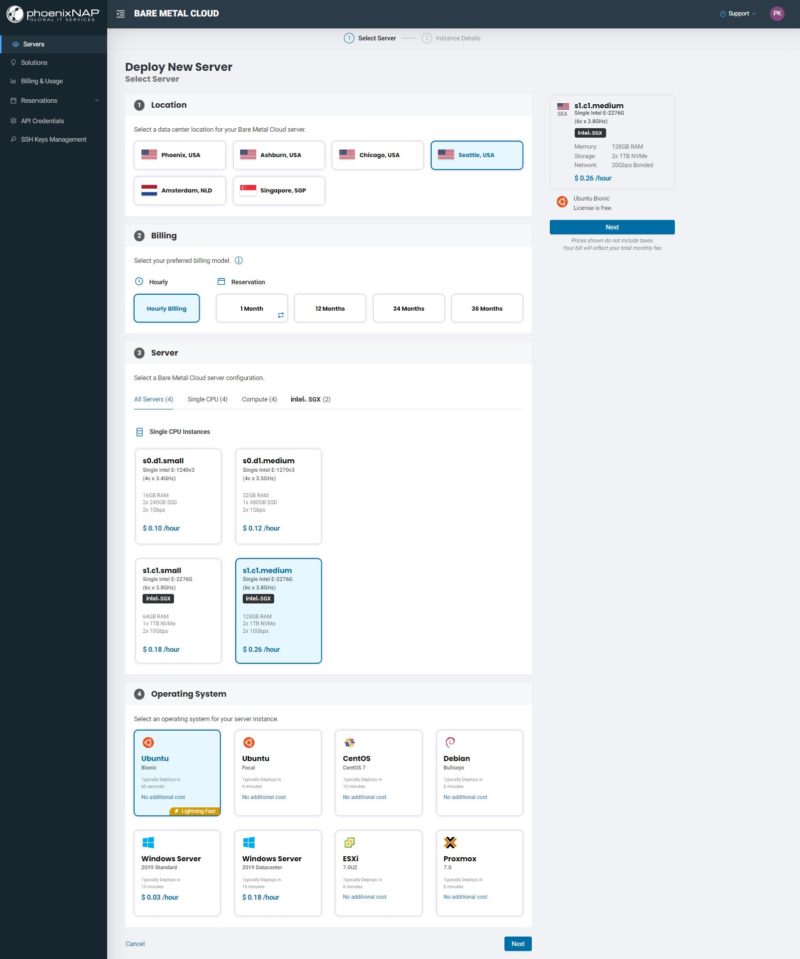
Jumping to #4, that screen also has a number of different OSes including VMware, CentOS 7 (hoping this becomes Rocky or Alma soon), Debian, Windows, ESXi, and Proxmox. We are going to show a cool example of this later, but that is what is available today. Also, a quick note is that the Windows Server licensing hourly cost is based on the machine type, so as you would expect picking a dual-socket server increases the Windows Server licensing costs.
While Seattle and Chicago only have four machine types right now, Phoenix, Ashburn, Amsterdam, and Singapore all have 35-37 types of machines. Here are the dual-socket offerings from Phoenix for example:
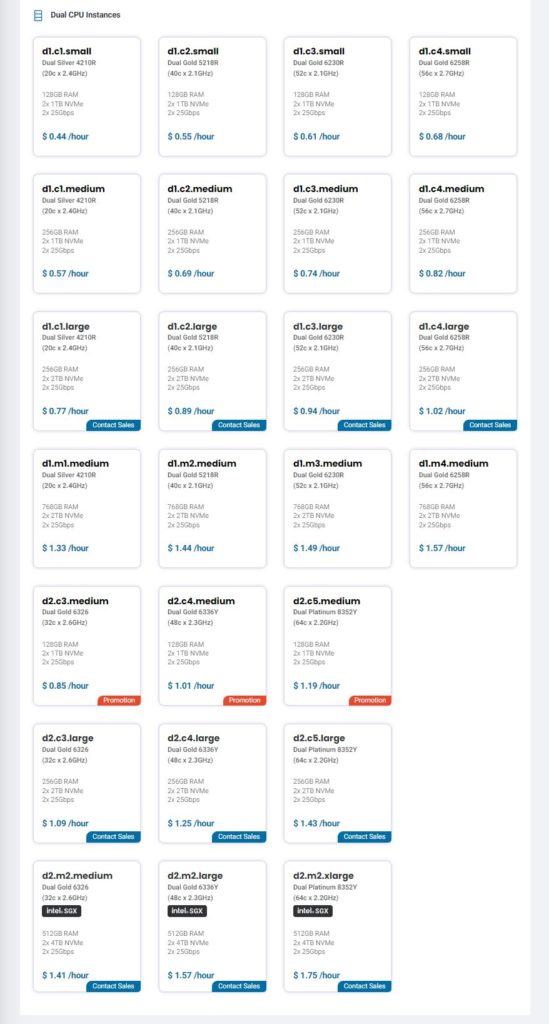
Here you can see that you can get up to dual Intel Xeon Platinum 8352Y CPUs which are 32 core parts for 64 cores total.
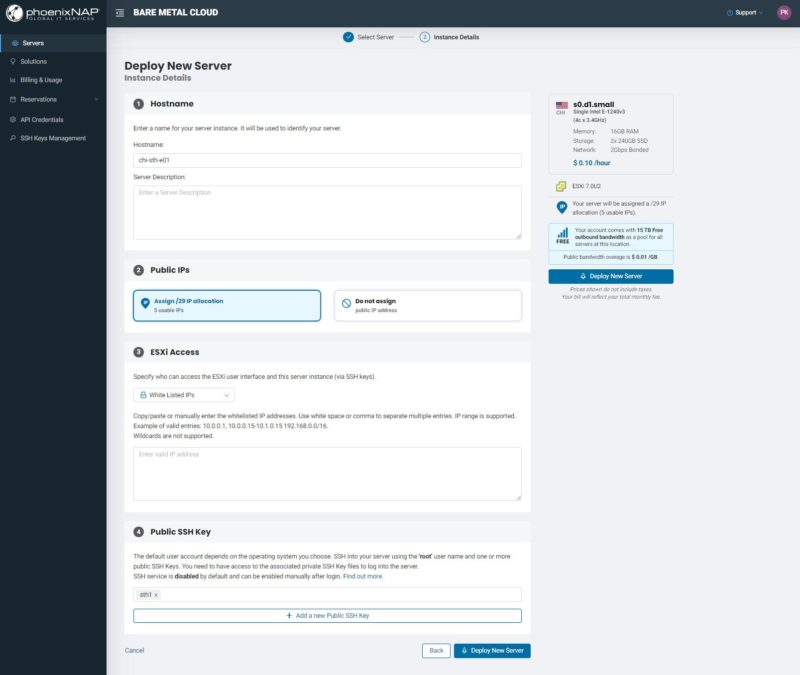
Once you have selected the type of server to install, you can give it a hostname, decide whether you want to give it public IPs (a /29 for 5 IP addresses seems to come with every server.) You can then whitelist IP addresses to access the instance or provide a range for access. Finally, you can manage keys that will be used.
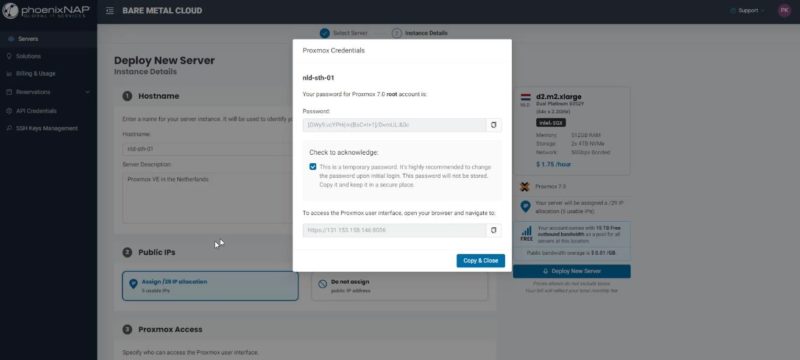
Some of the additional options will have additional prompts. Here is an example of a Proxmox VE server installation. PhoenixNAP automatically configures the system so you get an automatically generated root login in addition to the SSH keys along with the login URL:
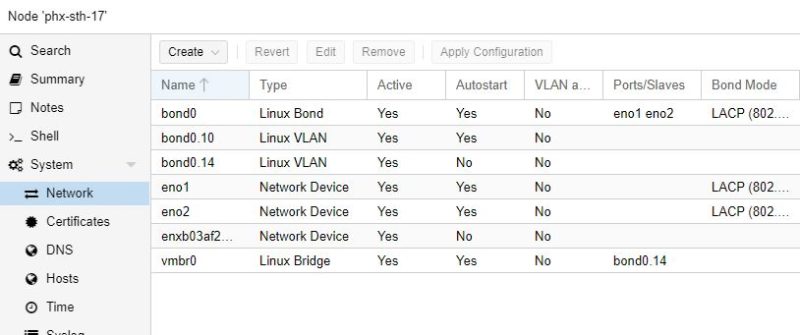
The system configuration often goes beyond just simple “the server is up”. Here is an example where we can see that the provisioning service created bonds for 2x 10GbE (there are also 2x 1GbE and 2x 25GbE options depending on the server), the gateways, internal IPs, external IPs and so forth. As the servers are provisioned, having these bonds needs to match the upstream networking so all of this is done for you. Also, a quick note here is that you get internal IPs so system-to-system traffic in the cloud is not counted for the metered data transfer.
Once you get an e-mail stating that the machine has deployed, you can connect to the server’s console and get a Supermicro HTML5 iKVM session.
With that done, it is time to build something fun.


That proxmox cluster install was neat
I didn’t realize how much cheaper it is to go off AWS.
Is that Rancher feature new? I looked at this sometime in october or november but I didn’t see it then
Signing up didn’t work for me, the payment processor first refused my e-mail address for containing a plus, then it turns out the button to pay simply doesn’t work… So far I’m not impressed.
@Samir, we first launched our Rancher integration back in July last year, but we enabled HA cluster deployment and added additional features a couple of months ago.
@Nils, sorry to hear that. We might be able to help with the login and we’d definitely like to hear if something hasn’t worked for you. You can contact feedback@phoenixnap.com and let us know about your experience, so we know what we can fix.
nice ad
Got a working account now, there are quite a few rough edges but I’m still quite impressed by the level of current generation Hardware offered, not something you see everywhere.